The long-awaited, blood-soaked Dead Island 2 released today, and after almost a decade of waiting, I’m sure you have some questions. The game shares a peacefully embarrassing sense of humor with the first game, 2011’s Dead Island, repeatedly referring to your threatening surroundings as “Hell-A” while being gory enough to actually justify the zombified dad joke, but it’s also changed in important ways. Skill cards make their first appearance, and playing on modern consoles comes with its own idiosyncrasies.
The unknown is scary. But I’ll guide you through it, and tell you everything I wish someone told me before I started playing Dead Island 2.
How to unlock co-op
Dead Island 2, like the original, employs co-op, so that players can wield an array of unique playable characters—six, in this case—against a neverending onslaught of zombies with dislocated jaws.
To activate co-op in a new game, play through the first three missions of the main story. Co-op unlocks in the fourth, appropriately named “Call the Cavalry,” and you’ll be able to add, at most, two players to your game by choosing either “online options” or “social” when prompted.
Once co-op is enabled, as long as they’re at the same point in the game or earlier, you can accept a friend’s request to join their game, or you can select “Join” from the main menu for a random multiplayer pairing. Quest progress saves in co-op, so you’ll be able to play the entire game while alternating between single and multiplayer at your leisure.
Note that there’s no crossplay, though.
I know it’s annoying, but you should spam the “pick up” button
Like Amazon continues to turn our planet into a desolate Funko Pop landfill, Dead Island 2 environments are stuffed with stuff. You’ll find upgrade materials like adhesives, aerosols, and blades on top of tables, inside shut drawers, and raining down from felled like you burst a grisly piñata.
Forget your hand-wringing about storage management—in the zombie apocalypse, everyone’s a scavenger. Pick the stuff up. All of it. As long as you’re regularly upgrading weapons using the materials you’ve found, you’ll find that your Dead Island 2 inventory is impressively bottomless.
Keeping upgrade materials on hand saves you time when you’re at sporadic upgrade workbenches. Though these benches allow you to “track” materials you’re missing, they’re most helpful when you have your materials ready to go, and can repair broken weapons or make them even stronger immediately before your next fight.
To make space, scrap worthless weapons like wooden planks and sell real weapons to traders for lots of money. Upgrade materials let you create weapon mods, upgrades, and repairs, but money is necessary to actually buy them.
You’ll need to make trade offs between special mods and attack power
You’ll unlock and find motley weapon blueprints (often placed, conveniently, right on top of an undiscovered workbench) as you progress further into the game, allowing for wild mods that turn your weapon into two-punch electro-cutioners and cremators, as well as upgrades that bolster your weapon’s damage output.
While the constant influx of shiny toys is understandably tempting, you should be aware that extreme weapon modifications and upgrades aren’t always compatible. While some upgrades’ descriptions plainly indicate that they need certain mods to be equipped, general upgrades like Damaging, which increases a weapon’s damage dealt, will lose their overall potency when paired with a mod. Try to have a plan for the type of weapon you want to ultimately end up with before you irrevocably alter it at a workbench.
“Slaughter” is a perfect weapon upgrade
The game’s huge range of weapon customization options leaves a lot to consider, but I think you should especially prioritize the Slaughter upgrade.
It lets you hack limbs off with more efficiency, making it most compatible with gliding bladed weapons like katanas and hunting knives, but also lifts weapon durability.
Dead Island 2 weapons can break obnoxiously quickly, leaving you suddenly barefisted in the middle of an encounter.
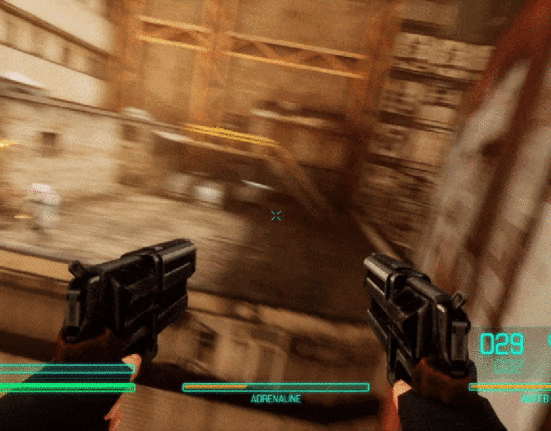
Though you can keep track of weapon breakage by looking at the depleting meter in the bottom right corner of the screen, it’s best to avoid it by adding Slaughter. Don’t forget to repair your favorite weapons whenever you’re near a workbench, too.
You can’t bulldoze through combat—learn to dodge
Despite Dead Island 2’s quickly forming reputation as a brainless, mass bloodletting event, trying to aimlessly plow your way through fields of snarling zombies will get you killed quickly, and destroy your weapon stash even faster.
To protect both yourself and your arsenal, practice dodging, or tapping L1 in the split seconds before a zombie attacks—and I really do mean split seconds.
It took me a while to master the timing. I’d recommend you practice by singling out rogue zombies you come across while exploring environments, and not necessarily in the middle of a stressful main mission. When you nail a dodge (or, alternatively, block an incoming attack), you stun a zombie, opening them up for a health-melting counter attack.

When a zombie mob is descending, use their own powers against them
Just as each playable slayer has their own innate advantages, every zombie you encounter will have its own violent quirk.
Most of them are thematic and obvious. Like, a frizzy zombie surrounded by blue sparks will eventually release a giant explosion of electricity, or a crispy zombie completely immersed in flames will, if it touches you, set you on fire.
Notice these quirks and use them to your advantage when you’re confronted by swarms of zombies that, at first glance, seem unmanageable. Throw a fuel can at a fire zombie to trigger a remote AoE eruption that will murder nearby zombies. Using an electric modded weapon to burst a hole into the water canisters some zombies carry on their backs, and turn the resulting puddle into a livewire trap.
And, once it becomes accessible to you in the game, don’t forget to use Fury Mode, which builds up as you slay zombies and imbues you with their destructive powers, for a brief period of time.
Make sure to level up, but it’s not necessarily as crucial as you might think
Once you hit a main story boss battle or reach a wild enemy with a skull over its head, meaning it’s higher level than you, you’ll feel the power disparity immediately.
To avoid getting overwhelmed by too-strong enemies, take a look at main story and side quests’ recommended levels and make sure your natural leveling up matches them before attempting them.
Though, you don’t have to be at a chapter or enemy’s recommended level to try it. Most of the time, especially in the rogue combat you’ll spend most of your time engaging with, leveling up makes a barely discernible difference in terms of damage output or defense. Most standard wild enemies also conform to your level, too, reflected by the number that appears next to the name over their heads.
If you get stuck on the main story, pivot to a side quest you can benefit from
In the case that you are not at the appropriate level to finish a main level chapter (without great difficulty, at least), don’t worry; you have 33 side quests to choose from.
You’ll unlock these without really trying—by exploring new environments, answering radio calls, or chatting with friendly NPCs.
But before you commit to a side quest, open up the Quests tab, glance at the rewards listed, and consider what your main story goals are. Do you want to level up ASAP? Pick a side quest with abundant XP gains. Do your weapons all suck, and you need something more excruciating? Take the side quest that gifts you a special weapon. Have fun while being practical. Slay responsibly.

Don’t shy away from customizing your low-stakes skill deck
As you blaze through levels, the main story, and side quests, slots on your skill card deck will unlock. You acquire skill cards without truly trying, either grabbing them after you’ve spammed your “pick up” button, or by killing for them.
You can rearrange or cull your deck at any time, so try any skill card that intrigues you. Most skill benefits are nebulous enough—specializing the type of kick you do, or how you regenerate health—that choosing them never feels make-or-break. It’s more like deciding whether or not you want pickles on your burger.
Did you know there’s voice control?
Dead Island 2 has a unique voice-control system, which beguiled me at first as someone who knows how to use the computer, but just barely.
It lets you speak scripted commands to swap weapons, taunt zombies, and engage extra-powerful Fury Mode, among other things, by using a microphone and your Amazon account.
To activate it, plug your Amazon account information into the “Alexa Game Control” section of the Options menu, make sure Voice Commands is set to “enabled,” and select your preferred input audio device. Read through the available commands in the Voice Controls, found in the Tutorials section, and wonder, like me, if Jeff Bezos can hear you scream.
What are your best Dead Island 2 tips so far?






Leave feedback about this