
Following Link’s descent from Great Sky Island, your time is really your own. There’s a main quest which you should definitely make some progress in (especially if you want the all-important paraglider early on), but stretching your legs a bit and exploring what secrets this gorgeous world has in store for you is well worth it. One place you’ll want to consider checking out is Kakariko Village.
“Find the Fifth Sage,” one of the main quests, will end up taking you to Kakariko Village eventually, but the trip is worth it early on as you’ll come across some shrines along the way. Plus, exploring this world is always a treat. I’ll mention a side quest or two you may want to pick up on your trip, but don’t worry, I won’t spoil how to complete them here.
How to get to Kakariko Village from Lookout Landing
As one of the first places you’ll find when touching down on the surface of Hyrule, Lookout Landing is where we’ll start. Make sure you’ve activated the tower there since this guide will call out a few places you’ll need the paraglider for. Also, grab a good amount of arrows before you go. I recommend at least 10.
Read More: Zelda: Tears Of The Kingdom’s Paraglider Is Easy To Miss, Here’s How To Get It
From Lookout Landing, head southeast. Stay on the road until you come to a three-way split; facing southeast, take the leftmost path. You’ll want the lake to be on your left as you proceed. You’re heading for Rebonae Bridge. There’s an opportunity to get into a brawl with some hostile Constructs and Bokoblins along the way if you’re in the mood for a skirmish.
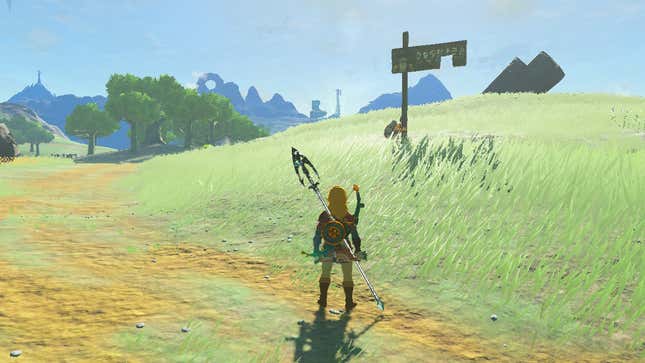
Before reaching the bridge, you’ll come across poor Addison, stuck there holding a damn sign featuring his beloved boss, President Hudson. Help the guy out by using Ultrahand to grab something from the nearby stack of wood to support the sign. He’ll give you a Red Rupee for it, as well as some Veggie Rice Balls. Continue onto the bridge when you’re done.
On the bridge you’ll run into Gladis who’ll chat your ear off about Bubbulfrogs and Bubbul Gems. He’ll clue you in on where to get the Mystic Robe: an item you can trade Bubbul Gems for all the way east at Woodland Stable. There’s also a cave visible to the left of the bridge with some Horriblins inside. True to their names, these guys can hit hard and are tricky to deal with if you’re not used to ‘em, but the cave has some decent loot, so it might be worth the trip.
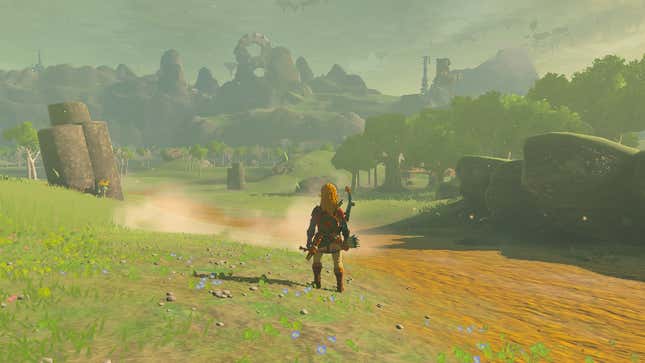
Cross Rebonae Bridge and keep to your right on the fork in the road. At the first bend, if you go straight ahead, you’ll find Wetland Stable. But before you do, look to your left and you’ll spot some rocks falling from a Sky Island. Do yourself a favor and hop on one and hit it with Recall to send yourself up to a small island. That’ll take you up to the Central Hyrule Sky Archipelago. This is a great vantage point to see where we’re going next.
From up here you’ll want to take note of two things: looking southeast, you should see Sahasra Slope Skyview Tower tower on your right, and a giant wheel to the left (that last one is a little rough to see with the game’s draw distance). That wheel (which is actually called a Ring Ruin) is where you want to be heading to find the town, however, you really ought to activate the tower first. As you might expect, it won’t be as straightforward as just walking in and hopping on a platform.
Before you hit the tower though, you might want to hit up the Tukarok and Morok Shrines. Tukarok is just behind the Wetland Stable, which is a short walk south of Rebonae Bridge (when the road makes a bend, keep going straight off the road, you can’t miss it).
You can then walk over and climb up to the Morok Shrine afterwards (if you do, speak with an NPC along the way to grab the “Impa and the Geoglyphs” quest), but you can also use a combination of your paraglider from the Sky Archipelago and some Zonai Wings to make the trip easier.
Read More: This Tears of the Kingdom Paraglider Trick Basically Lets You Fly Forever
Note: Walking over to Morok Shrine is complicated by a pretty steep climb (you’ll likely need two Stamina Vessels to make it up the tree root) and on two occasions I’ve encountered Gloom Hands underneath this Shrine location, so you’ve been warned.
How to activate Sahasra Slope Skyview Tower and fight the Battle Talus
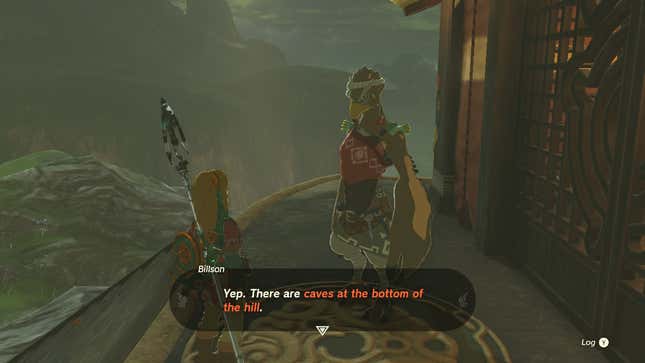
Once you reach the tower, you can have a chat with Billson in front of the tower door. He’ll tell you the door’s stuck. That’s unfortunate, but not impossible. He’ll also mention being hungry and thinking about mushrooms from the cave below, your clue to poke around at the base of the hill, though, weirdly, you can’t help poor Billson with his hunger or his mushroom craving.
You will need to hop down to the base of the hill and enter the cave there to progress, but there’s also a pretty robust foe wandering around on the surface nearby that you may want to deal with: a Battle Talus with three bokoblins riding on it. You can ignore them if you want, but it’s a pretty fun fight if you’re careful.
I recommend taking out the bokoblins first with arrows, or at least knocking them off the Talus. A small, annoying quirk I’ve noted about this fight is that holding ZL seems to favor targeting the Talus’ weak point rather than the bokoblins.
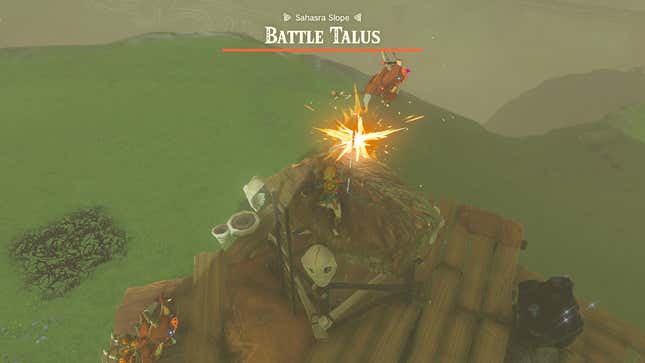
When you’ve dealt with the bokoblins, cycle through jumping off of higher ground onto the Battle Talus from left and right sides of the slope leading to the tower (the Talus can start walking up one side if you jump from the same spot each time which will wreck this strategy, so keep switching sides).
When on top of the Talus, strike the dark rock to damage its health. It’ll eventually toss you once you’ve done enough damage, so I recommend three or four strikes with a high-power weapon before leaping off, using your paraglider to get a good distance (one strike from this thing can easily kill you).
Once you’re done with this enemy (or should you choose to ignore the Talus for now), head into the caves at the base of the tower’s hill. There are two entrances on either side. At first you might not think there’s not much in here. You’ll need to fuse a rock to a weapon and start whacking the dark orange rocks (or use some other method to clear them out). You’ll want to keep going until you’re literally underneath the tower marker on the map. After that, use Ascend to travel up into the tower to spot the problem: two pieces of wood are keeping the door shut. Move those with Ultrahand or just grab them and slide the door open, surprising Billson and granting you access to the tower.
Finding Kakariko Village from the Sahasra tower
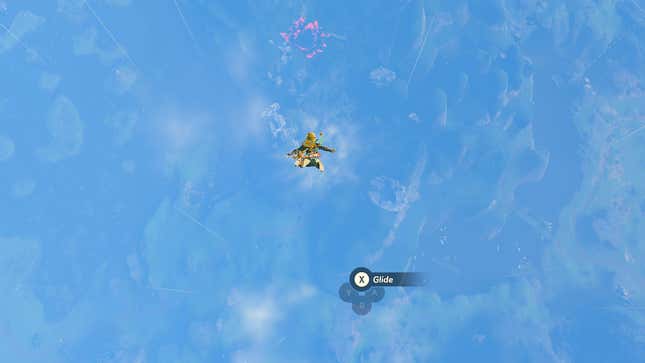
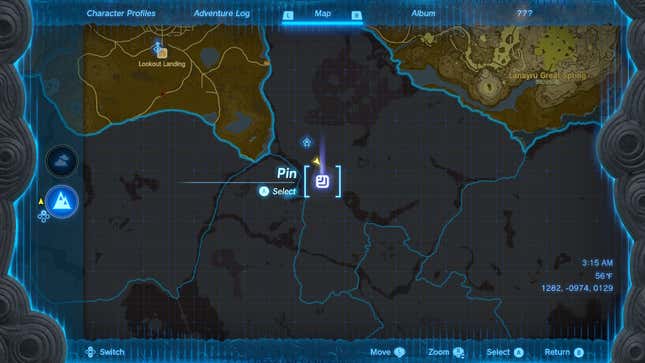
Launch yourself from the tower and let Link do his scan thing. Once you’re in freefall, you’ll want to pull back a bit to start falling toward the west, right where Kakariko Village is. You’ll spot a large red pit—that’s the direction you want to head (the Village is between the tower and that pit). Keep an eye out for Makasura Shine just overlooking Kakariko Village. When you’re ready, hop down there and start talking to some folks to pick up some quests.
Quests here include “A Trip Through History,” which will have you checking out the Ring Ruins for interesting historical insight; speak with Bugut to get started on that one. There’s also “Out of the Inn,” which will task you with finding where the local inn’s owner has run off to (you won’t be able to stay at this inn until you complete this quest); go try renting a room to chat with a certain individual about the owner’s whereabouts to log that one in your Purum Pad. You can also speak with Lasli near a fire on the east side of the village to get started on the “Gloom-borne Illness” side quest, while chatting with Trissa at the General Store will start one called “Codger’s Quarrel.”


Leave feedback about this